_OrangeLake_026-Edit.jpg)
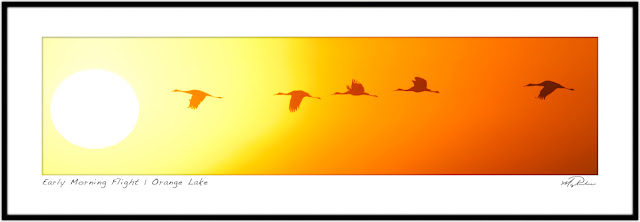
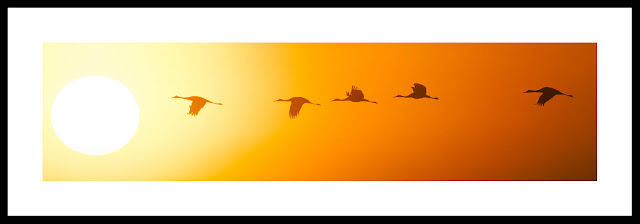
Adding a simple matte and frame to can help visually enhance the image when trying to show it off on your blog, portfolio, or website. It can also help in visualizing what the photo will look like once it's framed. Whatever the intent, in this tutorial I explain how to add a simple matte/frame and a title to any image.
The first step is to add a matte around your image. To do this, go to the Image drop down menu
and select Canvas Size. The Canvas
Size dialog will pop up. The top portion of the dialog box tells you the size of your current image. In this case it's a 1200 px by 300 px. The next part of the dialog box will ask you how
much extra canvas you want to add to the image. You can change the units by using the drop down menu. Check the Relative box as this will tell Photoshop that you want to add the desired amount to your image (as opposed to telling it the final size of the image).
Underneath is an anchor that allows you to select in what direction
you want to add canvas. This is useful if you want to add different amounts to
the top, bottom, right, and left sides of the image. For this example, we want
to add a 75 px border to all sides of the image (a quarter of the total height), so we will leave the anchor as
is. If we want to add 75 px to the top and bottom (as well as the left and right sides), then we need to tell it to add a total of 150 px for both the width and height.
The last part is to determine what color we want to
use for the canvas. You can use the drop-down menu to choose between white,
gray, and black. Or if you want a different color, click on the white square
and a new dialog box will appear. Now, if you want a color straight from your image, then hover the mouse away from the dialog box and over the image. The mouse pointer will turn into an eyedropper. Select the color that you want and then click OK. For this example, will keep it simple and use white for the mat. Once you click OK on the Canvas Size dialog box, the new image will have a 75 px border around it.
The next step is to add a black
border to simulate the frame. Repeat the steps above, but this time change the height and width to the desired size, in this case 30 px, and set the canvas color to black. The end result will
be your image with a white matte and a black frame.
 If you want to add text to the image, select the
text tool – it looks like a T and is on the tools panel on the left - or use
the keyboard shortcut T. Next, click
on the image where you want to add the text, and type away. You can change the font
and font size at any time. Once you are done, click on the checkmark to finalize your changes.
Notice that adding the text adds an extra layer to your document. The first layer is the image/mat/frame and the other is the layer for
your text. If you decide that you want to move the text around, then select the text layer and click on the move tool (keyboard shortcut 'V'). Once you are happy with the text and it’s location, flatten the
image by going to the Layer drop down
menu and selecting Flatten Image.
* In a future lesson, I'll discuss how to make your signature a brush stroke so that you have access to it with a click of a button. I can also discuss how to add a little more of a 3D look by using layers and layer styles.


This is incredibly helpful!
ReplyDelete